> ## Documentation Index
> Fetch the complete documentation index at: https://docs-staging-docs-event-stream-action-templates.mintlify.site/llms.txt
> Use this file to discover all available pages before exploring further.
> Learn how to configure Pushed Authorization Requests (PAR) for your application.
# Configure Pushed Authorization Requests (PAR)
To use Highly Regulated Identity features, you must have an Enterprise Plan with the Highly Regulated Identity add-on. Refer to [Auth0 Pricing](https://auth0.com/pricing/) for details.
The Auth0 Push Authorization Request (PAR) implementation is based on the [OAuth RFC9126: Push Authorization Request](https://www.rfc-editor.org/rfc/rfc9126.html) specification. For more information, see [Authorization Code Flow with Pushed Authorization Requests](/docs/get-started/authentication-and-authorization-flow/authorization-code-flow/authorization-code-flow-with-par).
By default, PAR is not enabled by your tenant. You can enable it in the Auth0 Dashboard under your tenant settings. To learn more, read [Enable PAR for a tenant](#enable-par-for-a-tenant).
After enabling PAR for your tenant, you can send authorization requests to both the `/oauth/par` and the `/authorize` endpoints. However, to fully secure your authorization flow, set PAR as required for an application via the [Management API](https://auth0.com/docs/api/management/v2) or **Application Settings** on the Auth0 Dashboard.
## Enable PAR for a tenant
To enable PAR for a tenant, use the [Auth0 Dashboard](https://manage.auth0.com/).
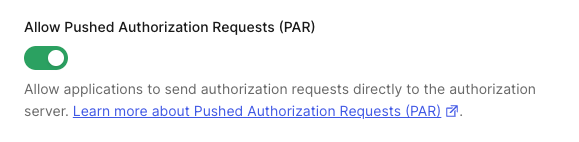
1. Navigate to Auth0 Dashboard > Settings > Advanced.
2. Scroll down to **Settings** and toggle on **Allow Pushed Authorization Requests (PAR)**.
 ## Require PAR for an application
Your tenant must have **Allow Pushed Authorization Requests (PAR)** enabled at the tenant-level before enabling PAR at the application-level.
1. Navigate to Auth0 Dashboard > Applications.
2. Select the application.
3. Select the **Application Settings** tab.
4. In the **Authorization Requests** section, enable the toggle **Require Pushed Authorization Requests (PAR)**.
Your tenant must have **Allow Pushed Authorization Requests (PAR)** enabled at the tenant-level before enabling PAR at the application-level.
Use the following code sample to configure PAR for your application using the Management API:
```bash lines theme={null}
curl -X PATCH --location 'https://TENANT.auth0.com/api/v2/clients/CLIENT_ID' \
--header 'Authorization: Bearer MANAGEMENT_ACCESS_TOKEN' \
--header 'Content-Type: application/json' \
--data-raw '{
"require_pushed_authorization_requests": true
}'
```
## Learn more
* [Authorization Code Flow with Pushed Authorization Requests (PAR)](/docs/get-started/authentication-and-authorization-flow/authorization-code-flow/authorization-code-flow-with-par)
## Require PAR for an application
Your tenant must have **Allow Pushed Authorization Requests (PAR)** enabled at the tenant-level before enabling PAR at the application-level.
1. Navigate to Auth0 Dashboard > Applications.
2. Select the application.
3. Select the **Application Settings** tab.
4. In the **Authorization Requests** section, enable the toggle **Require Pushed Authorization Requests (PAR)**.
Your tenant must have **Allow Pushed Authorization Requests (PAR)** enabled at the tenant-level before enabling PAR at the application-level.
Use the following code sample to configure PAR for your application using the Management API:
```bash lines theme={null}
curl -X PATCH --location 'https://TENANT.auth0.com/api/v2/clients/CLIENT_ID' \
--header 'Authorization: Bearer MANAGEMENT_ACCESS_TOKEN' \
--header 'Content-Type: application/json' \
--data-raw '{
"require_pushed_authorization_requests": true
}'
```
## Learn more
* [Authorization Code Flow with Pushed Authorization Requests (PAR)](/docs/get-started/authentication-and-authorization-flow/authorization-code-flow/authorization-code-flow-with-par)